Elevate Your Floors!

Join the Wood Flooring Pros community for expert maintenance tips and the latest trends in Australian timber craftsmanship.

Subfloor Preparation for Wood Flooring


Best Practices for Subfloor Preparation Before Wood Flooring Installation

Posted on: 2026-03-06
By: Lucas Harrington


Have you ever stepped onto a beautiful hardwood floor and wondered what makes it feel so solid and stable? The secret often lies beneath—the subfloor. Proper preparation of this foundational layer is crucial for achieving flooring perfection.

What You Will Learn

  • The importance of structural integrity in subfloor preparation to prevent bouncing and flexing of wood floors.
  • How managing moisture levels in the subfloor can prevent warping and buckling of wood flooring.
  • Common challenges in subfloor installation, such as uneven surfaces and dirt buildup, and effective solutions to overcome them.
  • Best practices for subfloor preparation, including assessing the subfloor condition, cleaning, leveling, and moisture testing.
  • Key takeaways for both DIYers and contractors to avoid pitfalls during subfloor preparation, emphasizing attention to detail and quality materials.

Subfloor Preparation: Key Steps and Challenges for Wood Flooring

Understanding the critical steps in subfloor preparation is essential for a long-lasting and beautiful wood floor installation. Below is a visual guide to the core processes and common challenges encountered. For a more detailed look at the installation process, check out our hardwood flooring installation guide.

Essential Preparation Steps

  • Assess current subfloor condition.
  • Clean, dry, and free of contaminants.
  • Level uneven areas.
  • Conduct moisture testing.
  • Choose right underlayment.

Common Challenges & Solutions

  • Uneven Surfaces: Use leveling compounds.
  • Dirt & Debris: Thorough cleaning.
  • Moisture Issues: Moisture tests & barriers.
  • Squeaks/Loose Boards: Check early & repair.
  • Poor Material Quality: Use quality materials.

Understanding Subfloor Preparation for Wood Flooring Installation

When it comes to installing wood flooring, subfloor preparation is often overlooked but is a critical step for ensuring a successful outcome. I’ve seen firsthand how proper preparation can dramatically enhance the beauty and longevity of your floors. Imagine stepping onto a brand new hardwood floor that feels solid and stable beneath your feet—this is what can be achieved with a well-prepared subfloor!

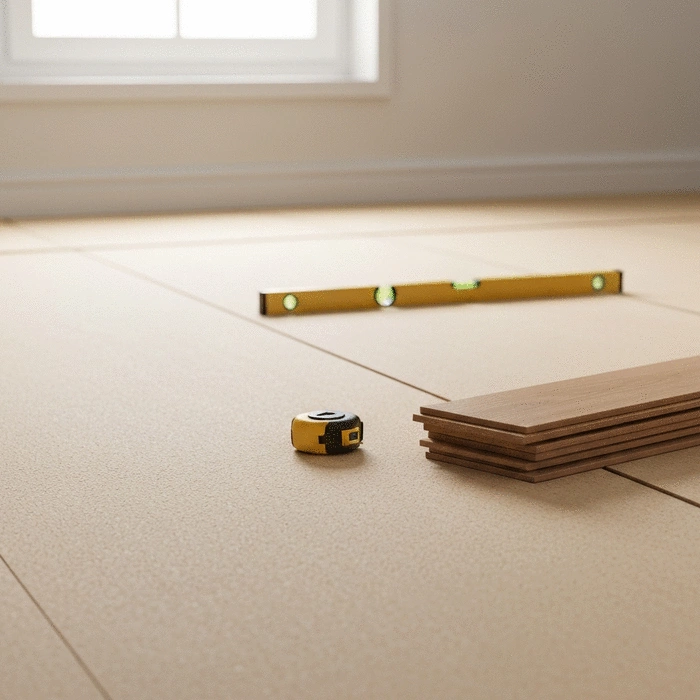
Professional contractor checking a plywood subfloor for levelness

Not only does a well-prepared subfloor set the stage for your wood flooring, but it also helps prevent future issues like squeaks and uneven surfaces. So, before we dive into the installation, let’s take a moment to discuss the importance of preparing your subfloor correctly.

Why Subfloor Preparation is Crucial for Successful Hardwood Installation

The subfloor is the foundation of your flooring project, and its condition directly impacts the performance of your wood floors. An improperly prepared subfloor can lead to a range of problems, from uneven surfaces to moisture damage. Here are a few key reasons why subfloor preparation is essential:

  • Structural Integrity: A stable subfloor supports your flooring and minimizes issues like bouncing or flexing.
  • Moisture Control: Proper preparation ensures that moisture levels are managed, helping to prevent warping or buckling of your wood flooring.
  • Enhanced Aesthetics: A well-prepared subfloor leads to a smoother and more visually appealing finish.

At Wood Flooring Pros, we believe that investing time in subfloor preparation pays off in the long run. It’s about creating the ideal conditions for your beautiful new wood floors to thrive!

Common Challenges in Subfloor Installation and How to Overcome Them

As a flooring expert, I've encountered various challenges during subfloor preparation. Here are some of the most common issues you might face, along with solutions to overcome them:

  • Uneven Surfaces: Use leveling compounds to fill in low spots and create a flat surface.
  • Dirt and Debris: Clean your subfloor thoroughly to remove all contaminants that could affect installation.
  • Moisture Issues: Conduct moisture tests and use moisture barriers where necessary.

Addressing these challenges early on not only saves you time but also ensures that your flooring installation goes smoothly. Remember, a little effort in preparation leads to a lot of satisfaction down the road! For more insights into maintaining the beauty of your floors, explore our year-round wood floor care tips.

Pro Tip

Did you know? Investing in a high-quality moisture barrier can significantly enhance the longevity of your wood flooring. This crucial step not only protects against moisture damage but also helps maintain a stable temperature, ensuring your floors look beautiful for years to come!

Recap of Essential Subfloor Preparation Best Practices

As we wrap up our guide on subfloor preparation, it’s crucial to highlight the key points for a successful hardwood flooring installation. Whether you’re a DIY enthusiast or a professional contractor, following these best practices can make all the difference.

  • Always assess the current condition of your subfloor before installation.
  • Ensure your subfloor is clean, dry, and free of contaminants.
  • Level any uneven areas to create a smooth base.
  • Conduct moisture testing to protect your wood flooring investment.
  • Choose the right underlayment to enhance performance and durability.
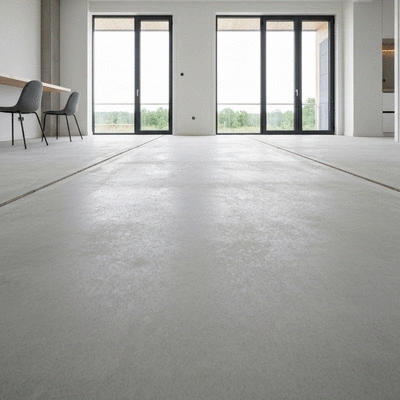
Clean and level concrete subfloor ready for hardwood installation

With these essential steps, you’ll set the stage for a beautiful and long-lasting floor that enhances the overall aesthetic of your space. Remember, preparation is key!

Key Takeaways for DIYers and Contractors

No matter your experience level, keeping these takeaways in mind will help you avoid common pitfalls during subfloor preparation:

  • Don’t skip the moisture testing—it's vital in preventing future issues!
  • Be meticulous when cleaning the subfloor; every little detail counts.
  • Check for squeaks or loose boards early on to ensure structural integrity.
  • Use quality materials for leveling and underlayment for better results.

By following these tips, you can confidently tackle your flooring project, knowing you’ve laid a strong foundation for success! If you're weighing your options, consider the pros and cons of DIY vs. professional wood flooring installation.

Final Thoughts on Achieving a Lasting and Successful Flooring Installation

At Wood Flooring Pros, we understand that a beautiful wood floor starts with solid subfloor preparation. The effort you put into this stage will pay off in durability and aesthetics. A well-prepared subfloor not only enhances the look of your flooring but also extends its lifespan.

Imagine walking into your home and seeing stunning, perfectly installed wood flooring that feels just right underfoot. It’s not just about the look; it’s about the experience! Take the time to prepare your subfloor properly, and you’ll enjoy the fruits of your labor for years to come.

Frequently Asked Questions About Subfloor Preparation

Here are some common questions about subfloor preparation for wood flooring:

Q: Why is subfloor preparation so important for wood flooring?
A: Subfloor preparation is crucial because it creates a stable, level, and dry foundation for your wood floors. Proper preparation prevents issues like squeaks, uneven surfaces, and moisture damage, which can significantly impact the longevity and appearance of your flooring.
Q: What are the essential steps for subfloor preparation?
A: The essential steps include assessing the current condition of the subfloor, cleaning it thoroughly, leveling any uneven areas, conducting moisture tests, and choosing the appropriate underlayment.
Q: How can I address uneven surfaces in my subfloor?
A: Uneven surfaces can be corrected using leveling compounds to fill in low spots. For higher areas, sanding or grinding may be necessary to achieve a flat surface.
Q: What role does moisture testing play in subfloor preparation?
A: Moisture testing is vital to ensure that the subfloor's moisture content is within acceptable limits for wood flooring installation. High moisture levels can lead to warping, buckling, or mold growth. Moisture barriers can be installed if necessary.
Q: Can I skip subfloor preparation if my existing subfloor looks fine?
A: It's strongly discouraged to skip subfloor preparation, even if the subfloor appears fine. Hidden issues like minor unevenness or undetected moisture can cause significant problems with your new wood floor over time. A thorough inspection and preparation ensure the best results.

Resources and Next Steps for Your Flooring Project

Downloadable PDF Checklist for Subfloor Preparation

Ready to get started? Download our comprehensive Subfloor Preparation Checklist that breaks down each step you need to take. This handy tool will guide you through the process, ensuring you don’t miss a thing!

Further Reading and Video Tutorials to Enhance Your Skills

If you’re eager to learn more, we offer a range of resources to help you improve your flooring skills. Here are some valuable options:

  • Watch our video series on subfloor preparation techniques.
  • Read articles on specific flooring materials and their installation.
  • Join our community for tips and shared experiences from other flooring enthusiasts.

These resources are designed to provide you with the knowledge you need to tackle your flooring project with confidence and skill!

Exploring Professional Installation vs. DIY Installation: Pros and Cons

Considering whether to go the DIY route or hire professionals? Each option has its advantages and disadvantages. DIY can save you money but requires time and effort, while hiring professionals ensures quality but can be more expensive. Think about your budget, skills, and the complexity of your project to make the best choice for your situation!

Recap of Key Points

Here is a quick recap of the important points discussed in the article:

  • Assess the current condition of your subfloor before installation.
  • Ensure your subfloor is clean, dry, and free of contaminants.
  • Level any uneven areas to create a smooth base.
  • Conduct moisture testing to protect your wood flooring investment.
  • Choose the right underlayment to enhance performance and durability.

Subscribe & Share
Hardwood Floor Care Schedule Guide Hardwood Floor Care Schedule Guide Did you know that maintaining hardwood floors can significantly extend their lifespan and enhance th
Sustainable Wood Flooring for Homes Sustainable Wood Flooring for Homes Are you considering a flooring upgrade that combines beauty with sustainability? Sustainable wood fl
Herringbone and Plank Flooring Guide Herringbone and Plank Flooring Guide As you consider your flooring options, think about how the right choice can enhance not just the aes
Banner
Wood Flooring Pros

Your premier Australian specialist for mastering wood craftsmanship in your home. We help homeowners achieve the perfect look with eco-friendly installation and expert refinishing guidance.

Trusted by local families, our mission is to provide durable, high-quality flooring solutions backed by Lucas Harrington’s decade of industry expertise.

Explore Our Craft
Recent Posts
Hardwood Floor Care Schedule Guide Hardwood Floor Care Schedule Guide

Did you know that maintaining hardwood floors can

Sustainable Wood Flooring for Homes Sustainable Wood Flooring for Homes

Are you considering a flooring upgrade that combin

Herringbone and Plank Flooring Guide Herringbone and Plank Flooring Guide

As you consider your flooring options, think about

Expert Flooring Insights