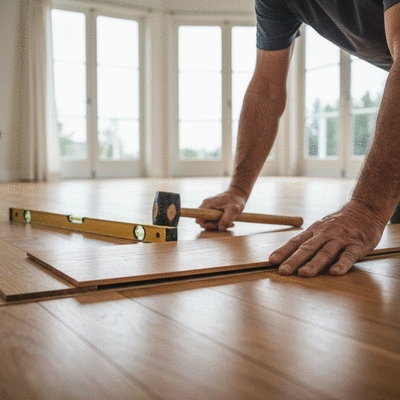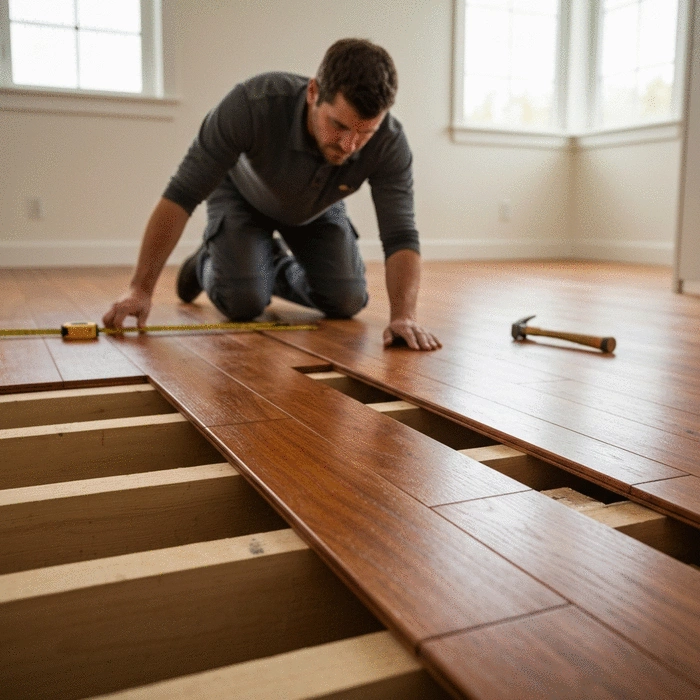
Nail-Down Method
Cost: $4 - $7 per sq ft
- ✓ Durable, great for solid hardwood
- ✗ Labor-intensive, requires wooden subfloor
Join the Wood Flooring Pros community for expert maintenance tips and the latest trends in Australian timber craftsmanship.
Posted on: 2026-02-06
By: Lucas Harrington
As the saying goes, "Quality is not an act, it is a habit." Embracing this philosophy is essential when it comes to selecting and installing hardwood flooring. Understanding the nuances of the installation process can make all the difference. Here’s what you will learn about ensuring a seamless flooring experience.
Understanding the financial and time commitments for your hardwood flooring project is crucial. This visual breaks down typical cost estimates for various installation methods. For a comprehensive overview of expenses, you can explore wood flooring installation costs in Australia.
Cost: $4 - $7 per sq ft
Cost: $5 - $9 per sq ft
Cost: $3 - $6 per sq ft
$3 - $8
per square foot (approx.)
When it comes to installing hardwood flooring, the process can seem daunting. As the owner of Wood Flooring Pros, I’ve seen firsthand how a well-executed installation can transform a space. So, what can you expect from professional installers? Let’s break it down!
A typical installation team consists of skilled professionals who each have specific roles. From measuring the space accurately to ensuring the flooring is laid evenly, each step is crucial. Homeowners should prepare by clearing the area of furniture and ensuring that the subfloor is ready for the new flooring. Typical timelines for the complete installation can range from a few days to a week, depending on the size of the project.
Preparing your home for the installation is key! Ensure that the space is clean, and consider relocating any valuables to prevent damage during the process. This will not only help the installers but also save you time in the long run.
There are several methods for installing hardwood flooring, but the two most popular are the click and glued-down methods. Each has its advantages and disadvantages, which can influence your choice.
Choosing the right method impacts both the installation process and the long-term performance of your flooring. For instance, while click flooring may seem appealing due to its ease, it might not be suitable for every environment. Make sure to consult with your installer for the best fit! For more detailed guidance, consider checking out this guide on installing hardwood flooring.
Let’s delve into the various techniques available for hardwood flooring installation. Understanding these methods can help you make an informed choice that aligns with your lifestyle and the specific needs of your space.
Each method has its unique applications and benefits. For example, nail-down is often favored for its stability, while the floating method offers flexibility in environments like basements. A conversation with your flooring specialist at Wood Flooring Pros can clarify which technique suits your project best!
Before any installation begins, professionals assess the condition of your subfloor. This includes checking for stability and moisture levels. A reliable moisture meter is often used to ensure the subfloor is dry enough for hardwood.
In my experience, a well-prepared subfloor sets the foundation for a successful installation. If the subfloor isn't stable or has moisture issues, it could lead to problems down the line.
Acclimating hardwood flooring is a crucial step that many homeowners overlook. This process allows the wood to adjust to the humidity and temperature of your home, preventing warping and other issues later.
Typically, it takes about 48 hours for hardwood to acclimate properly. During this time, keep the planks in the rooms where they will be installed, allowing them to adapt to your environment.
The underlayment plays a vital role in the installation process, especially when it comes to moisture control and sound reduction. It acts as a barrier, protecting your new flooring from moisture that may seep up from the subfloor.
Selecting the correct underlayment not only improves the overall performance of your flooring but also enhances your comfort. Discussing options with your installer ensures that you choose the best fit for your new hardwood floors!
Did you know? Acclimating your hardwood flooring before installation is crucial. This step allows the wood to adjust to your home's temperature and humidity, preventing potential warping or buckling down the line. Always give your planks at least 48 hours to acclimate in the space where they'll be installed for optimal results!
The cost for hardwood flooring installation typically ranges from $3 to $9 per square foot for materials, depending on the method (nail-down, glue-down, floating). Professional labor costs generally fall between $3 and $8 per square foot, bringing the total to $6 to $17 per square foot.
The timeline for hardwood flooring installation can vary from a few days to a week, depending on the size of the project and the complexity of the space. This includes preparation, installation, and drying/curing times for methods like glue-down.
Acclimation is crucial because it allows the hardwood planks to adjust to the temperature and humidity levels of your home. This process typically takes about 48 hours and helps prevent issues like warping, buckling, or gapping after installation.
The click method is often easier and faster to install, making it suitable for DIYers, but it may feel less solid. The glued-down method provides a more permanent and stable solution, ideal for high-traffic areas and moisture-prone environments, though it can be messier and requires longer drying times.
To prepare your home, clear the installation area of all furniture and valuables. Ensure the subfloor is clean and ready. It's also advisable to establish a temporary living space if high-traffic areas are being worked on and maintain open communication with your installers.
When it comes to installing hardwood flooring, understanding the costs and timeframes involved can make a significant difference in your planning. As someone who has worked in this industry for over a decade, I’ve seen firsthand how important it is to have realistic expectations. Let's dive into what homeowners need to consider before starting their hardwood flooring project!
First off, let's tackle the financial aspect of your flooring project. The cost of professional installation can vary widely based on several factors, such as the type of wood you choose and the specifics of your space. Here are the key components that will influence your budget:
By planning ahead and factoring in these elements, you can avoid any budget surprises. I always recommend getting at least three quotes from different professionals to find the best value for your project. For more details on budgeting and care, consider reading about budgeting for wood floor care.
On installation day, the disruption to your routine is something to consider. Here are some tips to help you minimize that disruption:
These steps can help you maintain some normalcy during the installation process. Remember, a little preparation goes a long way!
Different installation methods come with their own cost structures. Here's a quick comparison of what you can expect:
| Installation Method | Cost per Square Foot | Pros | Cons |
|---|---|---|---|
| Nail-Down | $4 - $7 | Durable, great for solid hardwood | Labor-intensive, requires a wooden subfloor |
| Glue-Down | $5 - $9 | Excellent for moisture areas | Can be messy and requires a longer drying time |
| Floating | $3 - $6 | Easy installation, versatile for different subfloors | May feel less solid underfoot |
Understanding these cost estimates can help you make informed decisions that align with your budget and needs. No matter which method you choose, I'm here to ensure it meets your expectations!
Here is a quick recap of the important points discussed in the article: